Fittings
Fittings | |
| Selecting the right fittings for a boat you build so they all work together is difficult. There are many solutions to choose from. Selecting one solution has implications for other fittings. A lot of the fittings make working mechanisms and they have to work. The ideal is to avoid too much trial and error as each iteration requires more holes to be drilled in the boat. The pictures that follow are the starting point, everything works but not everything works as well as it could. I expect in a couple of seasons a number of things will be different. All holes are filled with silica thickened epoxy or marine silicone sealant. I found MarineStore good for fittings. | 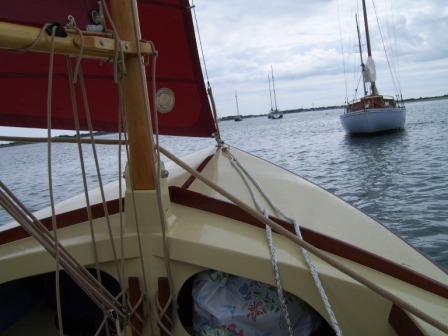 |
| Two stainless steel brackets are bolted to the rudder stock. The stainless brackets are being replaced with a single 2mm stainless steel U section as they are not strong enough. The ash tiller is passed through stainless steel brackets and held in place with a 5mm split pin pushed through holes in the tiller and both sides of one of the brackets. The rudder uphaul and downhaul (attached to the trailing and leading edge of the rudder blade) are threaded through bullseye fairleads on either side of the rudder stock and adjusted through cleats on either side of the tiller. The rudder downhaul is shockcord allowing the rudder blade to lift when running aground. |  |
| Rowlocks were raised on small blocks making the rowlock vertical all allowing the oars would clear the gunwale. Moving the oarlocks inboard allows the oars to be shorter so they will fit in the boat out of the way. It also makes it less likely that the oars will be levered out of the rowlock during rowing than if the rowloak was on the gunwale. | 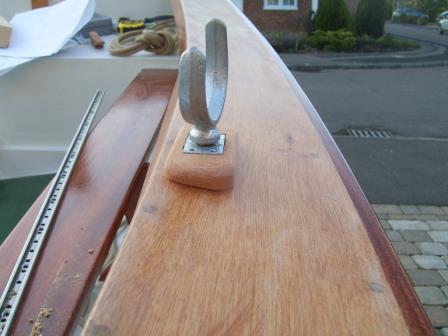 |
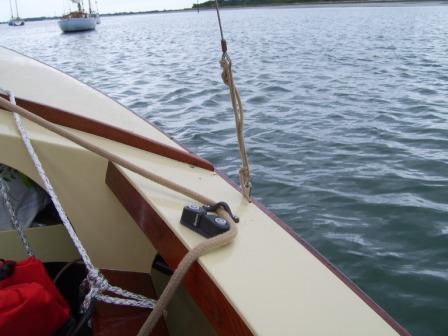
| The shroud attaches at the bow to an RWO R2420 fitting. I had already fitted the laminated bow stem cap before I thought about how to attach this fitting. In order to fit this I drilled and chiselled into the bow fillets to accommodate the fitting and then drilled through the laminated bow stem cap so screws could be placed through the fitting into the boat fillet. The bow stem cap was varnished and the foredeck painted. Silica thickened epoxy was put into the holes and the fitting screwed in place. The holes in the bow stem cap were plugged and then varnished. I strongly recommend you find an easier way to do this. The shrouds are attached to the fitting with a lanyard. | 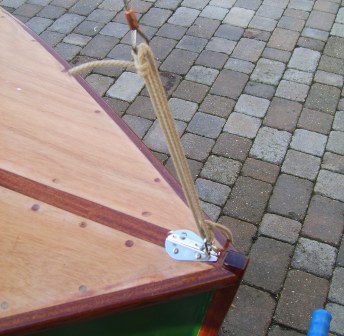 |
| The two other shrouds attach to shroud plates which are bolted through the hull. The hull is strengthened with an additional thickness of ply at this point. The shrouds are attached to the fitting with a lanyard which attaches to the shroud plate with a shackle. The shrouds determine the angle of the mast, it rakes backwards 130mm over 3000mm. It is important to get this right or the boom may be too low over the boat. The shackles save untying the lanyand and then having to ascertain the right length again. | 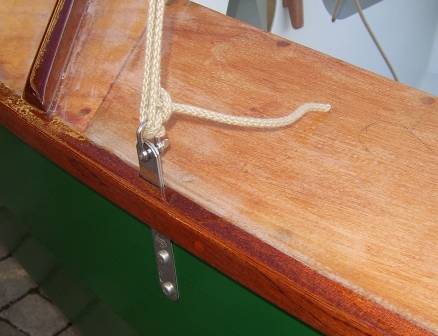 |
| I had shrouds made by Classic Marine who were extremely helpful and offered excellent advice. There is a soft loop at the top which fits over the top of the mast and is prevented from sliding down by two hardwood blocks bolted through the mast. There is a short loop for the jib halyard. The peak halyard passes through a smooth rounded hole in the mast. This works but I intend to replace it with a sheave. | 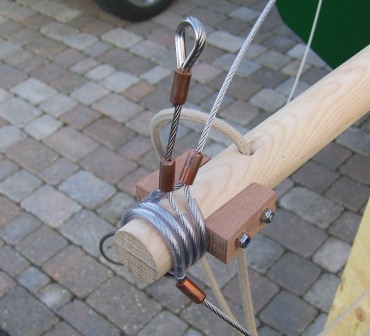 |
| Halyards need cleats to attach to so I made nice large ones from hardwood. | 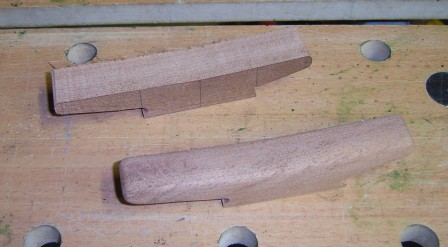
|
| The cleats are screwed throught the frame into blocks of douglas fir which are large enough to strengthen the frame and spread the load. The screw holes in the cleats are plugged and the cleats are oiled rather than varnished. The cleat for the jib halyard is on the lower left, the peak and throat halyards are above it in the centre. The kicking strap attached to an eye just below the two central cleats. | 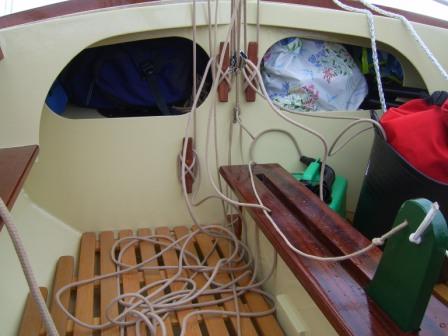 |
|
There is a lot going on here, I will get a better photo of this.
There are 4 ways of reefing (that I can think of).
1. Drop the gaff into the boat and move the peak halyard.
2. Use a peak halyard sliding on a wire bridle and a throat halyard to set the gaff height. This works on a gaff rig but on a gunter rig I dont think there is enough room for the wire bridle without the boom getting too low at the stern.
3. Use a sliding track for the peak halyard and a throat halyard to set the gaff height.
4. Use one halyard to set the gaff height and another to keep the gaff close to the mast. This requires adjusting two halyards when reefing.
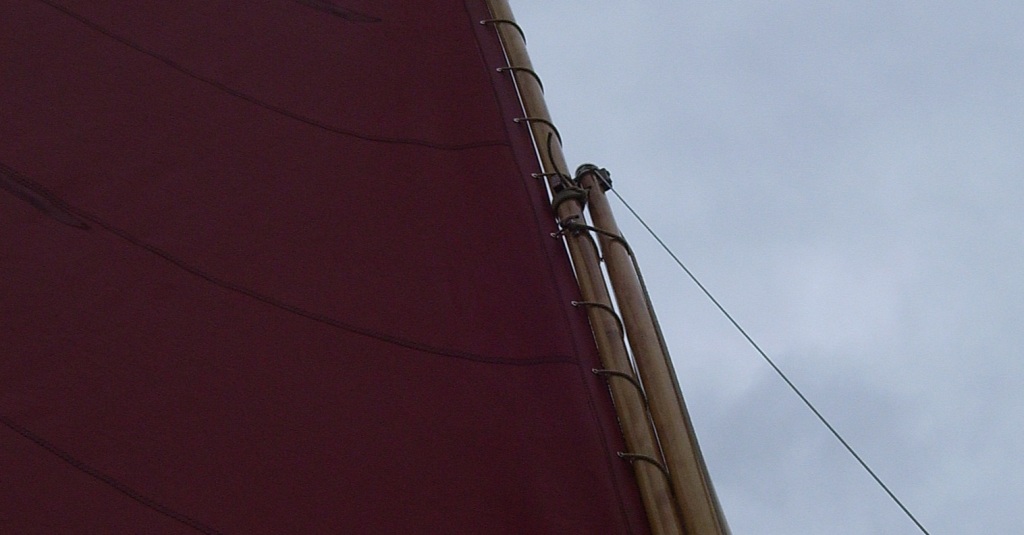
I have implemented option 4 but may move to 3 depending on how this works. The photo shows the peak halyard attached with a halyard bend below two hardwood blocks. Below this the 'throat halyard' goes through a stainless lacing eye in the gaff, round the mast, through another lacing eye on the other side of the gaff and then down to a cleat below the mast. One halyard adjusts the height the other keeps the gaff close to the mast allowing the sail to be reefed. |
 |
|
This photo shows the shroud attaching to the shroud plate with a lanyard. This needs some improvement as I find the lanyard loosens a bit when under sail. The noise the tight shroud makes when this happens is disconcerting.
Also shown is the jib sheet eye and cleat. The eye will be changed as the sheet does not run freely enough in light winds. The cleat and eye may benefit from moving 6 inches towards the stern, particularly when sheeting in when close hauled. |
 |
| The kicking strap attaches to the boom with a halyard bend, it is prevented from sliding forward by a hardwood block. The lower end of the kicking strap attaches to an eye screwed through the frame. Blocks at each end give a large mechanical advantage. The downhaul runs through an eye, back through the sail, back through the eye and onto a cleat giving a 3:1 advantage albeit with a bit too much friction. The boom jaws are leather lined to protect the mast. The mast has beeswax on it to stop the leather lined jaws creaking. The boom jaws are tied round the mast. There used to be parrel beads here but the jib sheet used to catch on them when tacking. The boom is held down by a length of rope tied to the kicking strap eye. | 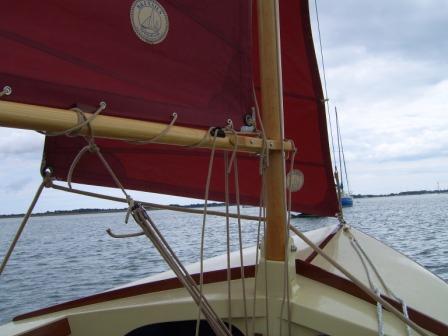 |
| The outhaul passes through an eye, back through the sail, back through the eye and onto a cleat giving a 3:1 advantage albeit with a bit too much friction. It is ok for adjusting before sailing but not that good once underway. A block is tied to the boom between hardwood blocks to stop it sliding along the boom. The blocks are placed well forward of the end of the boom. The mainsheet goes through this and another block giving a 2:1 advantage which is ok in a force 4 and after that it is hard work and time to reef anyway. | 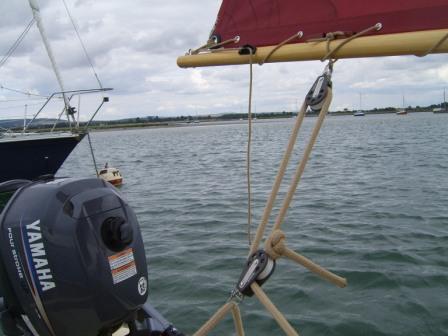 |
| The lower mainsheet block is attached to a length of rope which is tied through holes in strengthened parts of the side decks. These holes are well forward of the stern which in combination with the position of the mainsheet block on the boom keeps the mainsheet forward and out of the way of the outboard. Three pieces of ply glued to leather protect the transom from the outboard. | 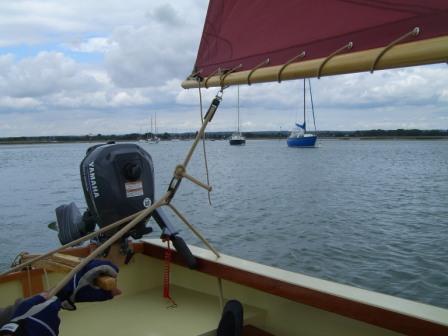 |